Image Map

Sunday 29 December 2013

Christmas nail art tutorial Penguin, Erik from Happy Feet 2

Merry Christmas! So if you saw my previous post you’ll have seen that I’ve been practicing some Christmas nail art. I loved Rudolph and I hope you do too. But I now have another little cutie.

Introducing Erik, the penguin from my favourite film, Happy Feet 2. Much like Rudolph – it’s a loteasier than it looks. Here are five simple steps for you to follow…ENJOY!

(I’m using Gel polishes here again, please let me know how you got on.)

Step 1:
After I’d prepped my nail, used Gellux’s fast bond and base coat I added my first layer of colour. Using Black Onyx (Gellux) I covered the whole nail. Once that’s dried/been cured add another layer of black to it to ensure the colour isn’t streaky.

Step 2:
Using my brush I created a round long circle to use as the penguins white belly (using Gellux’s Purely White) . Using my dotting tool I also added two white dots to start Erik’s eyes. I made them slightly larger than the dotting tool had by swirling the dotting tool around a little on the nail. 

Step 3:
Add another layer of white to the belly to ensure the colour is not streaky.

Step 4:
I added two smaller black dots into the white eyes to complete Erik’s eyes and created an orange by mixing Devil Red and Lemon Ice – both Gellux. (I then realised that I already had an orange…blonde moment). But this orange probably works out nicer anyway. I used the orange as a triangle nose between the eyes and the belly and the small feet either edge of the belly. 

Step 5:
Once this has been cured/dried, add a top coat and cure again. Then you should have a very cute little Erik!

TIP:
When creating Erik’s feet and nose, if like me you’ve mixed your colours you’re probably doing this anyway, but it’s easier to use a much thinner brush to ensure you get a better shape to it.


Christmas Rudolph nail art tutorial

Hello and Merry Christmas! 

So a few weeks ago I started to practice some Christmas nail art in case some of my clients wanted some. I saw a little Rudolph design on Pintrest and thought I’d never be able to do it. So I started off simple, with a Santa’s belt design etc – which turned out to be more complex that the Rudolph design!

So I thought I’d try. I couldn’t believe how easy it was to do, once you’ve got the head shape done it’s pretty much plain sailing from there on. I thought I’d share it with you as I absolutely love it and give you a few tips on how I found was easiest to do it. If you have any questions please ask!

I’m using gellux colours here, but I’m sure you could do it with nail varnish – I just don’t have the patience to wait for it to dry! So as you can imagine, I’m curing my nail in the UV lamp between each step.

Step 1:
After I’d prepped my nail, used Gellux’s fast bond and base coat I added my first layer of colour. I chose to use white as my base coat as I feel the other colours show up much better with it. The name of this specific colour is Purely White.

Step 2:
Add another layer of your base colour remembering to cap the free edge.

Step 3:
Using the brush create a large circle at the tip of the nail using a browny colour. The only brown I had was very light but I still think it works really well. This is called Wild Mink.

Step 4:
Go over the circle with the same colour to create depth to the colour and ensure it isn’t streaky.

Step 5:
Using a dotting tool make two white eyes (again, I’m using Purely White). But, try to make the dots slightly bigger by swirling the dotting tool around a bit on the nail to ensure there is enough room to add in a pupil later on. Using a red or a red glitter create a smaller circle at the bottom of the nail in the centre to create Rudolph’s famous nose. I’ve used Gellux’s Red Hot Ruby glittery red. 

Step 6:
Using a black colour add two lines coming out the top of the reindeers head. The black I’ve used from Gellux’s range is called Black Onyx. Add two black dots in the centre of the white eyes we’ve already created which will be Rudolph’s pupils. Go over the two black lines and add two more smaller horizontal lines in each of them to complete the antlers. Go over the nose with the red again to ensure it shines bright. 

Step 7:
Ensure you’re design lasts as long as possible by using a top coat. Of course, if you’re using gel – you’ll have to apply the top coat. And you’re finished with your own adorable little Rudolph. 

TIP:
If you’re really wanting to go all out. I’ve seen someone do Rudolph on one nail and plain nosed reindeers on every other nail – very cute. 


Monday 16 December 2013

New York Uni Trip December 4th-9th 2013

As the year comes to an end I wanted to update you on the best week of the year for me!

We'd been counting down the days from the minute we put the deposit down and I cannot believe how quick it came around!

New York was amazing, and truely is the city that never sleeps! Going to bed at half two in the morning only to wake up at six again for an exciting and packed day!

I can safely say we experienced it all from The Empire State Building to Ground Zero to the New York snow.

I don't think I could pinpoint the best part of the holiday, it was all so breath-taking and unbelievable!

I've never been to America, but I can confidently say, I will definitely be going back. Whether it be back to New York or somewhere new. It was such an experience and we are so lucky with the great location we had. Just a 30 second walk from Central Park and the weather was so good to us that we could walk to Ice Skating in Central Park with no coat or jacket.

The holiday made me laugh more than I ever have before, with such amazing people with me.

Ground Zero was so much more overwhelming than I expected. The stories we heard from the tour guides were so inspirational. The whole scenery was beautiful.

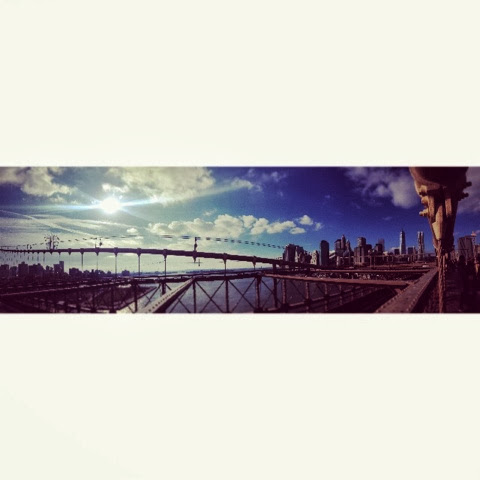
I would also recommend Ice Skating in Central Park. The view, as you can see from the photographs, was absolutely stunning. Everything is so tall and extraordinary that a lot of my photographs are panoramic! 

Here are a few pictures I wanted to share with you. Enjoy!...